Editor Overview
Editor Overview
The Novelez editor is where all the work on a single project takes place. You can write your story, adjust game settings, play-test, share, and export — all from the same screen.
Overall Layout
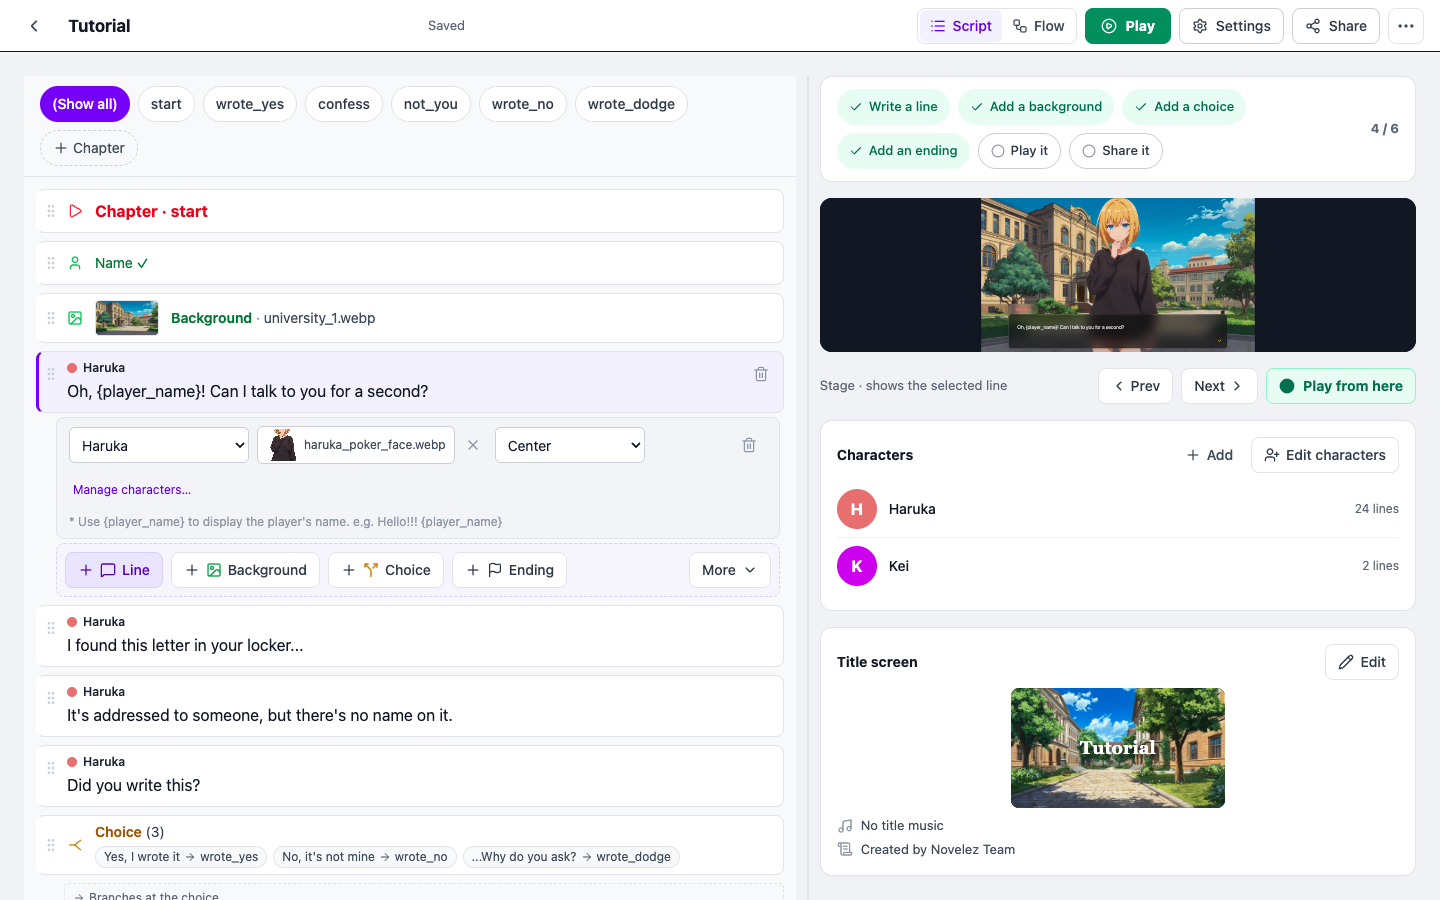
The editor is made up of a header along the top and two columns beneath it.
- Header — The project title, save status, view switcher, and the Play, Settings, and Share buttons.
- Script column (left) — The main area where you write your story. You type dialogue straight into a line, and add other blocks such as backgrounds and choices with the insert bar below the lines.
- Stage column (right) — Shows how the selected line looks in the actual game, and gathers your story progress, characters, and title screen in one place.
The two columns start at a 2:1 ratio. Grab the vertical divider between them with the mouse and drag to change the ratio, or double-click it to return to the default. With the divider focused, the keyboard ←/→/Home/End keys also work, and the ratio you choose is remembered by your browser. If the work area (the window minus the side margins) is narrower than 900px, the two columns stack vertically.
The Header
From left to right, the header contains:
- ← Back — Returns to your project list.
- Title field — Click to rename the project in place. If you clear the title and leave the field, the previous title is restored.
- Save status — Shows "Saving…", "Saved · 14:32" (the time varies), or "Waiting to save…". In the Tutorial it reads "Tutorial · changes aren't saved".
- Script | Flow — Switches between the line list (Script view) and the graph (Flow view) of the same story.
- [Play] (green) — Plays the game from the title screen (hint: "Plays from the title screen").
- [Settings] — Opens the Game settings panel (hint: "Game settings: title screen, music, credits").
- [Share] — Creates a share link. Once shared, the button changes to Shared.
- ⋯ More — Opens a menu of secondary actions.
In the Tutorial project, a [Make It Mine] button is also shown.

The ⋯ More menu contains, in order:
- Undo (⌘Z / Ctrl+Z) and Redo (⌘⇧Z / Ctrl+Shift+Z)
- Flow view / Script view
- Characters
- Game settings
- Export as text (.txt)
- Export Ren'Py project (.zip)
- 한국어 — switches the editor language between English and Korean; this changes only the editor UI, not the content of your game
There is no manual Save button in the header. The editor saves automatically 3 seconds after you stop typing, and also when you leave the editor. The only manual Save button is inside the Game settings panel.
The Script Column
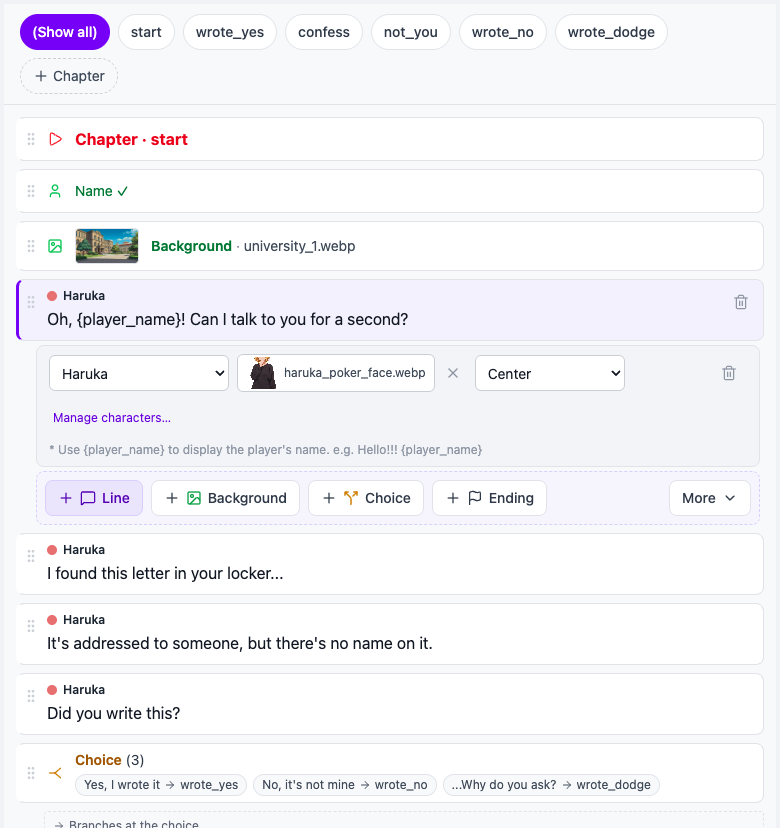
From top to bottom, the Script column on the left contains:
- Chapter pills — Appear at the top when there are two or more chapters. You get (Show all), one pill per chapter name, and + Chapter; click a pill to show only that chapter's lines. With a single chapter, only + Chapter is shown at the right edge.
- The list of lines (blocks) — Lines are stacked in the order they run. Drag the six-dot handle on the left of a line to reorder it, and hover over a line to reveal its trash icon for deleting.
- Dialogue lines — Each has a name tag and an input, so you write directly in the line. Enter creates a new line below it with the same speaker, and Shift+Enter inserts a line break inside the line. Pressing Backspace on an empty dialogue line deletes it and selects the line above. If the line above is a dialogue line, the cursor lands at its end. On the very first line nothing is deleted.
- Details under the line — Click a background, choice, chapter, or similar line to select it, and a details strip named "Selected block settings" opens right under it. For a dialogue line the same strip lets you pick the character, expression image, and position.
- Insert bar ("Add a block") — The buttons + Line, Background, Choice, Ending, and More ▾. A new block goes right after the selected line; if nothing is selected, it goes at the end of the list.
- Chapter end strip — Under the last line of each chapter, a dotted box shows how that chapter ends (for example, that it ends with an ending, or continues to another chapter).
More ▾ holds, in order: Music · Sound · Stop music · Show character · Hide character · Chapter · Go to chapter · Player info · Variable · Condition. Variable and Condition are always here — there is no separate mode to switch on. Player info can be used once per game, so it is greyed out when one already exists.
The Stage Column
The Stage column on the right has four parts, top to bottom:
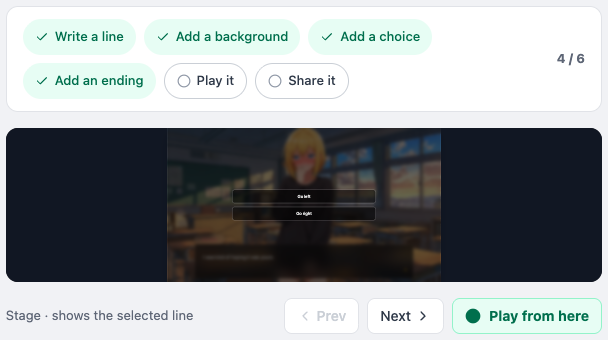
- Story progress card — Six chips: Write a line · Add a background · Add a choice · Add an ending · Play it · Share it. Finished steps get a green check, and the card shows "n / 6". Clicking a chip you have not completed takes you straight to that task (selecting or adding the matching line). When everything is done, the card reads "All set — share your story". The Tutorial has no Share chip.
- Stage (caption: "Stage · shows the selected line") — A 16:9 screen that works out the background, characters, and dialogue box by following the path the story actually takes to reach the selected line, so no backgrounds from other branches are left over. If the selected line is a chapter title line, or nothing before it has set a background or a dialogue yet, it previews the next background in the same chapter; with no background lines at all, it says "No background yet". Because it is view-only, choices shown here cannot be clicked.
- Bar under the Stage — [Prev] / [Next] move the selection in script order (following the chapter filter if you are filtering), and [● Play from here] runs the game from the selected line. To start from the title screen instead, use [Play] in the header.
- Characters and Title screen cards — The Characters card shows + Add, Edit characters, and one row per character (color dot, name, and number of lines); click any of them to open the Characters window. The Title screen card shows the title background thumbnail (or "No title image yet"), the title music (or "No title music"), a credits summary (or "No credits yet"), and an Edit button.
Script View and Flow View
The Script | Flow switcher in the header lets you swap between the two views at any time. Both show the same story in different ways.
Script View
The most basic view. Lines are listed top to bottom in the order they run. This makes it easy to follow the flow of your story and to add or reorder lines, so it suits most authoring work. First-time users are encouraged to start with Script view.
Flow View
A graph-style view that shows chapters as nodes, with Choice, Condition, and Go to chapter blocks drawn as arrows. Because it visualizes branches and reunions, it is especially useful when designing complex branching stories or multiple endings. Double-click a node to return to Script view showing only that chapter.
The Game Settings Panel
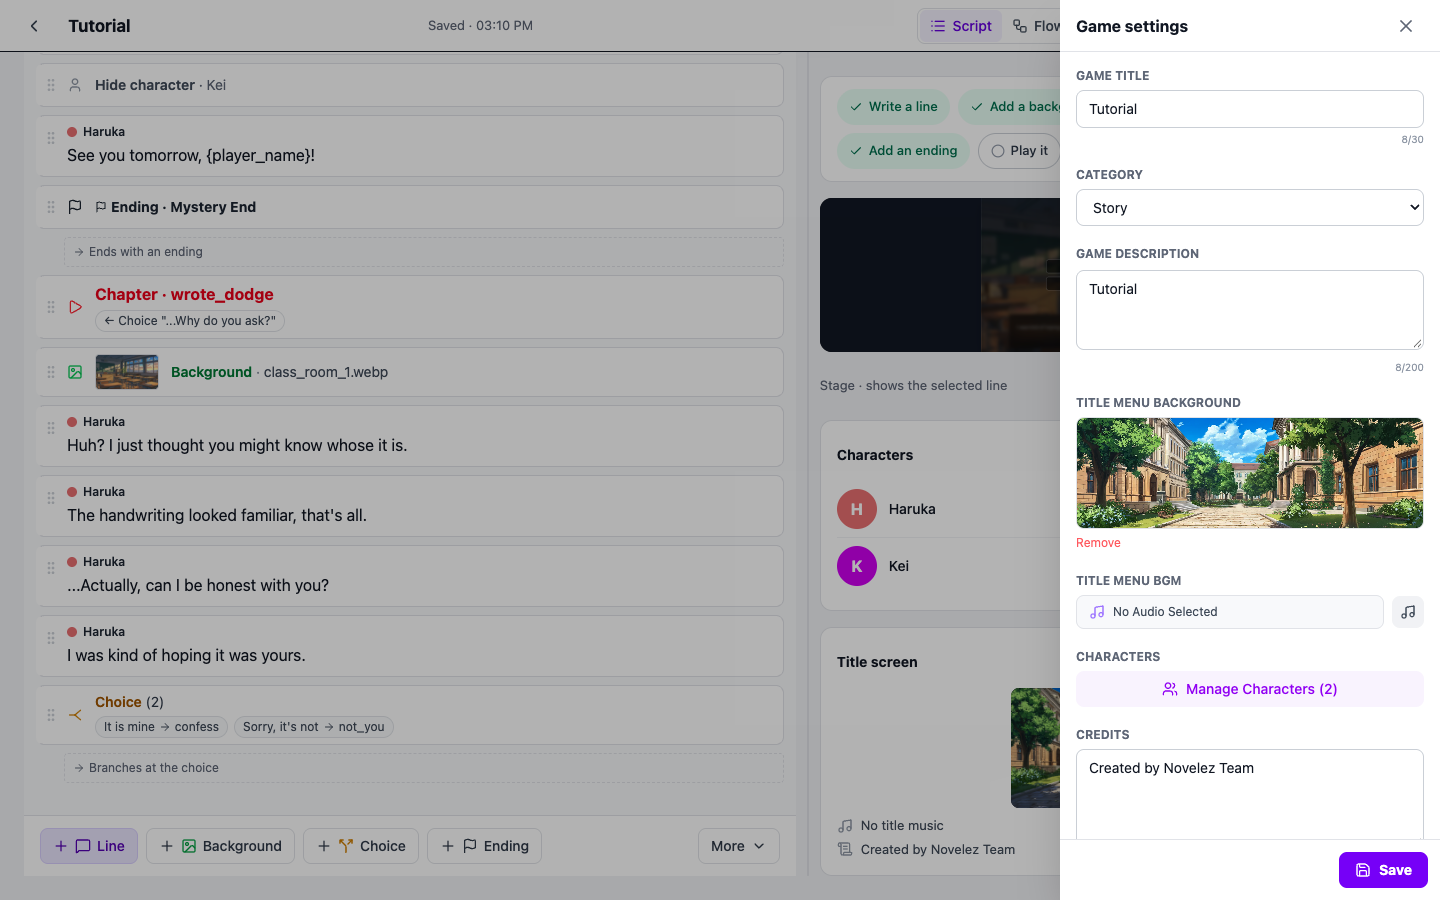
The backbone of your game — title, category, description, title-screen background, title music, characters, and credits — is managed in the Game settings panel, which slides in from the right. There are three ways to open it:
- [Settings] in the header
- Edit on the Title screen card in the Stage column (it opens right at the title background field)
- Game settings in the ⋯ More menu
Changes apply immediately and are saved automatically. You can also click Save at the bottom of the panel, which briefly shows a saving state and then confirms it is saved. Close the panel with X, Esc, or by clicking outside it. See the Project Settings chapter for each field.
Undo
If you add, delete, or edit something by mistake, press Ctrl+Z (outside a text field; ⌘Z on a Mac) to undo and Ctrl+Shift+Z (⌘⇧Z on a Mac) to redo. Undo and Redo in the header ⋯ More menu do the same. Deleting a line happens immediately without a confirmation dialog, so use undo to bring it back if you delete one by accident.
The Tutorial
Novelez provides a built-in project named Tutorial so you can learn the editor by following along in a real project. Follow the sample link on the Start screen, or open Tutorial from your project list, and a 9-step walkthrough starts. If this is your first time using Novelez, we strongly recommend completing the Tutorial first.
Next Steps
Now that you understand the layout of the editor, let us look at how to make the most of the Tutorial project.